By Meghna Gangwar, Andrea Anderson and Manikandan Kurup

Introduction
The Python programming language is a popular choice for both new and experienced developers. As a flexible and versatile language, its strengths include scripting, automation, data analysis, machine learning, and back-end development. This makes Python a useful tool for a wide range of programming tasks and professional fields.
This tutorial presents several methods for installing Python on a Windows 10 computer. It covers installation using the official installer, the Microsoft Store, package managers like winget and Chocolatey, the Anaconda distribution, and the Windows Subsystem for Linux (WSL). The guide will also walk you through verifying the installation, running a script, and setting up a virtual environment.
Key Takeaways:
- The most common and recommended way to install Python is by using the official installer from the python.org website, which offers the most control over the setup.
- During the installation process, it is critical to select the “Add python.exe to PATH” option to make Python accessible from the command line.
- Alternative installation methods are available for specific needs, such as the Microsoft Store for beginners, Anaconda for data science, and WSL for a Linux environment.
- After installation, you can verify that Python is working correctly by opening a Command Prompt and running the
python --versioncommand. - Using virtual environments is a best practice for managing project dependencies and avoiding package conflicts between different projects.
- The Python Launcher for Windows (
py.exe) is a useful tool for managing and switching between multiple Python versions installed on the same machine. - A frequent mistake is installing the 32-bit version of Python on a 64-bit system, which can cause performance limitations and compatibility issues with certain libraries.
Deploy your frontend applications from GitHub using DigitalOcean App Platform. Let DigitalOcean focus on scaling your app.
Prerequisites
You’ll need a computer running Windows 10 with administrative privileges and an internet connection.
Method 1: Using the Official Python Installer (Recommended)
This is the most common and flexible method for installing Python. It gives you full control over the installation, including optional features and PATH configuration.
Step 1 — Downloading the Python Installer
-
Go to the official Python download page for Windows.
-
Find a stable Python 3 release. This tutorial was tested with Python version 3.10.10.
-
Click the appropriate link for your system to download the executable file: Windows installer (64-bit) or Windows installer (32-bit).

Step 2 — Running the Executable Installer
-
After the installer is downloaded, double-click the
.exefile, for examplepython-3.10.10-amd64.exe, to run the Python installer. -
Select the Install launcher for all users checkbox. This enables all users of the computer to access the Python launcher application.
-
Select the Add python.exe to PATH checkbox. This allows users to launch Python from any command-line terminal.

-
If you’re just getting started with Python and you want to install it with default features, click Install Now and proceed to Step 5 - Verify the Python Installation. To install other optional features, click Customize installation and continue to the next step.
Step 3 — Customizing the Installation (Optional)
-
The Optional Features dialog includes common tools and resources for Python and you can install all of them, even if you don’t plan to use them.

- Documentation: Recommended for offline access to Python’s official documentation.
- pip: Recommended. Essential for installing other Python packages from the Python Package Index (PyPI).
- tcl/tk and IDLE: Recommended if you plan to use Python’s built-in Integrated Development and Learning Environment (IDLE).
- Python test suite: Useful for testing and learning about Python’s core features.
- py launcher and for all users: Recommended to help manage multiple Python versions.
-
Click Next.
-
The Advanced Options dialog appears.

Select the options that suit your requirements:
- Install for all users: Recommended if multiple people use the computer.
- Associate files with Python: Recommended. This option associates all Python file types with the launcher or editor.
- Create shortcuts for installed applications: Recommended to enable shortcuts for Python applications.
- Add Python to environment variables: This should already be checked if you selected it on the first screen.
- Precompile standard library: This can speed up the startup time for some applications but may slow down the installation.
- Download debugging symbols and Download debug binaries: Only needed if you plan to develop C or C++ extensions for Python.
Make a note of the Python installation directory in case you need to reference it later.
-
Click Install to start the installation. Once complete, a Setup was successful message will be displayed.

Step 4 — Adding Python to the Environment Variables (optional)
Skip this step if you selected Add Python to environment variables during installation.
If you want to access Python through the command line but you didn’t add Python to your environment variables during installation, you can still do it manually.
Before you start, locate the Python installation directory on your system. The following directories are examples of the default directory paths:
-
C:\Program Files\Python310: If you selected Install for all users during installation, then the directory will be system wide. -
C:\Users\Sammy\AppData\Local\Programs\Python\Python310: If you didn’t select Install for all users during installation, then the directory will be in the Windows user path.
Note that the folder name will be different if you installed a different version, but will still start with Python.
-
Go to Start and enter
advanced system settingsin the search bar. -
Click View advanced system settings.
-
In the System Properties dialog, click the Advanced tab and then click Environment Variables.
-
Depending on your installation:
-
If you selected Install for all users during installation, select Path from the list of System Variables and click Edit.
-
If you didn’t select Install for all users during installation, select Path from the list of User Variables and click Edit.
-
-
Click New and enter the Python directory path, then click OK until all the dialogs are closed.
Step 5 — Verify the Python Installation
You can verify whether the Python installation was successful either through the command line or the IDLE application, if you chose to install it.
-
Go to Start and enter
cmdin the search bar. Click Command Prompt. -
Enter the following command in the command prompt:
python --versionAn example of the output is:
OutputPython 3.10.10
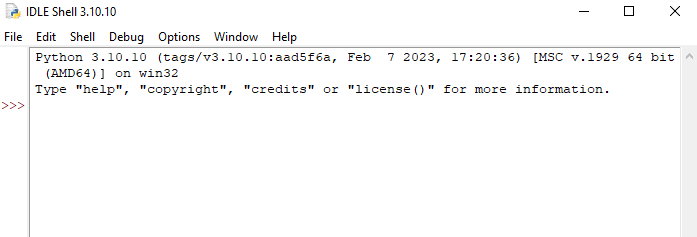
You can also verify the installation by opening the IDLE application. Go to Start and enter python in the search bar and then click the IDLE app, for example IDLE (Python 3.10 64-bit).
You can start coding in Python using IDLE or your preferred code editor.
Method 2: Using the Microsoft Store
This method is ideal for beginners using Windows 10 or 11. It offers a simple, one-click installation with automatic updates.
The Microsoft Store package is a sandboxed version of Python, which means it has some restrictions on accessing the full filesystem. However, it is a convenient choice for running scripts and learning the language.
-
Open the Microsoft Store application.
-
Search for
"Python"in the search bar. You will see several versions. Select the latest stable version published by the Python Software Foundation. -
Click the Install or Get button.
The Microsoft Store handles the installation and PATH configuration automatically. After installation, you can open a Command Prompt and run python to start the interpreter.
Method 3: Using Windows Package Managers
Package managers automate the process of installing, updating, and managing software. They are a popular choice for developers who prefer working from the command line.
winget (Windows Package Manager)
winget is the official package manager for Windows, included in modern versions of Windows 10 and 11.
-
Open PowerShell or Command Prompt.
-
Run the following command to find available Python packages:
winget search --id Python.Python -
Install the latest version of Python 3 with this command:
winget install Python.Python.3 --scope machineThe
--scope machineflag installs Python for all users. If you want to install for just the current user, remove the--scope machineflag.
Chocolatey
Chocolatey is a popular third-party package manager for Windows.
-
First, follow the installation instructions on the Chocolatey website.
-
Open an administrative PowerShell or Command Prompt.
-
Run the following command:
choco install python
Scoop
Scoop is another command-line installer for Windows that focuses on portable applications.
-
Follow the installation instructions on the Scoop website to install Scoop.
-
Open PowerShell and run the command:
scoop install python
Method 4: Using Anaconda or Miniconda
Anaconda is a distribution of Python and R specifically for data science, machine learning, and scientific computing. It comes with Python, a package manager called conda, and hundreds of pre-installed scientific libraries like NumPy, pandas, and Matplotlib. Miniconda is a smaller version that includes only Python, conda, and a few dependencies.
This method is best for users who plan to work on data science-related projects.
-
Go to the Anaconda Distribution website or the Miniconda website.
-
Download the installer for Windows.
-
Run the
.exefile and follow the on-screen instructions.
Note: Anaconda documentation recommends against adding Anaconda to PATH because it can conflict with other Python installations.
After installation, you can open the Anaconda Prompt from the Start Menu to use Python and the conda package manager.
Method 5: Using Windows Subsystem for Linux (WSL)
WSL lets you run a Linux environment directly on Windows, without the overhead of a traditional virtual machine. This is a powerful option for web developers, DevOps engineers, and anyone who prefers a Linux-like development environment on Windows.
-
First, install WSL on your machine. Open PowerShell as an administrator and run:
wsl --installThis command will install WSL and the default Ubuntu distribution.
-
After the installation and setup are complete, open your Linux distribution (e.g., Ubuntu) from the Start Menu.
-
Inside the Linux terminal, install Python using the apt package manager:
sudo apt update && sudo apt upgrade
sudo apt install python3 python3-pip
You now have a full Linux environment for Python development on your Windows machine.
Which Method Should You Choose?
The best installation method depends on your goals. The table below summarizes each approach.
| Method | Best For | Key Features |
|---|---|---|
| Official Installer | Most users, beginners, general development | Full control, includes pip and IDLE, official support. |
| Microsoft Store | Beginners, simple scripting | Easy installation, automatic updates, sandboxed. |
| Package Managers | Developers, system administrators | Command-line automation, easy to script and manage. |
| Anaconda/Miniconda | Data science, machine learning, scientific computing | Comes with many pre-installed libraries, conda environment manager. |
| WSL | Web development, DevOps, Linux users | Full Linux environment, access to Linux tools and workflows. |
Running Your First Python Script
Now that Python is installed, you can run your first lines of code. There are two primary ways to do this: using the interactive interpreter for single commands or running a script file for longer programs.
Method 1: Using the Interactive Interpreter
The interactive interpreter is a command-line tool that lets you execute Python code one line at a time. It’s great for testing small snippets of code.
-
Open Command Prompt.
-
Type
pythonand press Enter. Your prompt should change to>>>, indicating you are in the Python interpreter. -
Type the following code and press Enter:
print("Hello, World!")The interpreter will immediately execute the code and display the result.
Output>>> print("Hello, World!") Hello, World! >>> -
To exit the interpreter, you can type
exit()and press Enter, or pressCtrl+Zfollowed by Enter.
Method 2: Creating and Running a .py File
For any program more than a few lines long, you’ll want to save your code in a file. Python code files use the .py extension.
-
Create a folder for your project. For example, create a folder named
my_projecton your Desktop. -
Write your Python code. Type the following line of code into the text editor:
print("Hello, World!") -
Save the file as
hello.py. -
Open Command Prompt and navigate to your project folder.
cd Desktop\my_project -
Now, run your script by typing
pythonfollowed by the name of your file.python hello.pyThe output will appear directly in your terminal.
OutputC:\Users\YourUsername\Desktop\my_project>python hello.py
Hello, World!
You have successfully written and executed your first Python program.
Setting Up a Virtual Environment
As you start working on different Python projects, you’ll notice that they often need different versions of third-party packages. A virtual environment is a self-contained directory that holds a specific Python interpreter and its own set of installed packages, isolated from your global Python installation.
Using virtual environments is a best practice that prevents package conflicts and makes your projects more organized and reproducible.
Step 1 — Create a Virtual Environment
Python comes with a built-in module called venv for creating virtual environments.
-
Open Command Prompt and navigate to the project folder you created earlier (
my_project).cd Desktop\my_project -
Run the following command to create a virtual environment. We will name it
venvin this example, which is a common convention.python -m venv venvThis command creates a new folder named
venvinside your project directory. This folder contains a copy of the Python interpreter and a place to install packages.
Step 2 — Activate the Virtual Environment
Creating the environment isn’t enough; you must “activate” it before you can use it.
-
In the same Command Prompt window, run the activation script:
venv\Scripts\activate -
Your command prompt’s appearance will change to show the name of the active environment in parentheses.
(venv) C:\Users\YourUsername\Desktop\my_project>This indicates that the virtual environment is now active. Any Python packages you install will be placed in the
venvfolder, not in your global Python installation.
Step 3 — Install Packages
With the environment active, you can use pip, Python’s package installer, to install libraries. Let’s install the popular requests library as an example.
pip install requests
pip will download and install requests and its dependencies exclusively within the venv environment. You can see a list of installed packages with the command pip list.
Step 4 — Deactivate the Virtual Environment
When you are finished working on your project, you can deactivate the environment.
-
Simply type the following command to deactivate the virtual environment:
deactivate -
The
(venv)prefix will disappear from your command prompt, indicating you are back to your system’s global Python context.
Common Mistakes and Fixes
1. Not Checking “Add Python to PATH”
A frequent mistake during installation is failing to select the “Add Python to PATH” option. This checkbox tells the installer to modify the Windows Path environment variable, which allows you to run Python from any directory in the command line.
-
Mistake: During the installation process, the user does not check the box labeled Add Python to PATH.
-
Symptom: When you open Command Prompt or PowerShell and type
pythonorpip, you receive an error message stating that the term is not recognized as the name of a cmdlet, function, script file, or operable program. -
Fix: You have two options to correct this:
-
Option 1: Reinstall Python: The simplest method is to run the installer again. This time, make sure to check the Add Python to PATH box on the first screen.
-
Option 2: Manually Add Python to the PATH: If you prefer not to reinstall, you can add the necessary paths to the environment variables yourself.
-
Find the Python installation folder. The default location is usually
C:\Users\<YourUsername>\AppData\Local\Programs\Python\Python312. -
Copy the path to the Python executable and the
Scriptsfolder inside it. You will need both.-
C:\Users\<YourUsername>\AppData\Local\Programs\Python\Python312\ -
C:\Users\<YourUsername>\AppData\Local\Programs\Python\Python312\Scripts\
-
-
Search for “Edit the system environment variables” in the Start Menu and open it.
-
Modify the Path variable. In the System Properties window, click Environment Variables. In the new window, select the
Pathvariable under “User variables” and click Edit. -
Click New and paste the first path you copied. Click New again and paste the path to the
Scriptsfolder. Click OK to save your changes. You may need to restart your terminal for the changes to take effect.
-
-
2. Installing Multiple Versions Without Managing Them
Windows users often install multiple Python versions (e.g., 3.8, 3.10, 3.12) for different projects. Without a clear way to switch between them, this can cause confusion and lead to scripts running with the wrong interpreter.
-
Mistake: Multiple Python versions are installed on the system without a management tool or strategy.
-
Symptom: The
pythoncommand launches an unexpected version. A script that requires Python 3.10 might fail because the system defaults to Python 3.12. -
Fix: The official Python installer for Windows includes the Python Launcher (
py), which is the standard tool for managing multiple versions.To run a script with a specific version, use the
pycommand followed by a version flag:# Run a script with Python 3.10 py -3.10 your_script.py # Run a script with Python 3.12 py -3.12 your_script.pyYou can also set a default version by creating a
py.iniconfiguration file in your user directory (C:\Users\<YourUsername>\). For more advanced version management, consider tools likecondaorpyenv-win.
3. Confusing python vs. python3 Command
Many online tutorials are written for Linux or macOS, where the command to invoke Python 3 is often python3. On Windows, this is typically not the case.
-
Mistake: A user accustomed to Unix-like systems types
python3in a Windows terminal. -
Symptom: The terminal returns a “command not recognized” error.
-
Fix: On Windows, the command is almost always
python. You can verify this by running:python --versionIf you have multiple versions installed, the
pylauncher is the most reliable way to execute Python. If you prefer using apython3alias, you can create one in your PowerShell profile.
4. Mixing 32-bit and 64-bit Versions
Most modern computers run a 64-bit version of Windows. Installing a 32-bit version of Python on a 64-bit system can lead to performance limitations and compatibility problems, especially with scientific and data-intensive libraries.
-
Mistake: Installing the 32-bit Python installer on a 64-bit Windows operating system.
-
Symptom: You may encounter
MemoryErrorexceptions or issues with libraries that rely on heavy computation, such as NumPy, pandas, or TensorFlow, as they cannot access more than 4GB of RAM. -
Fix: Unless you have a specific requirement to interface with a 32-bit application, always download and install the 64-bit version of the Python installer from python.org.
5. Not Installing pip
pip is the package installer for Python and is included by default in modern Python distributions. However, certain custom installation options or older versions might exclude it.
-
Mistake: A custom installation is performed without including the
pipcomponent. -
Symptom: Running a command like
pip install <package_name>fails with a “command not recognized” error. -
Fix: You can install
pipusing the built-inensurepipmodule. Open a terminal and run the following commands:# Ensure pip is installed python -m ensurepip --upgrade # Upgrade pip to the latest version python -m pip install --upgrade pip
6. Running Python from the Microsoft Store Unintentionally
Windows includes a shortcut that directs users to the Microsoft Store if they type python in a terminal without having it installed. The Store version is suitable for beginners but has limitations that can interfere with serious development work.
-
Mistake: Installing Python from the Microsoft Store instead of the official website,
python.org. -
Symptom: The Python installation is sandboxed, which can cause permission issues when accessing the file system. Virtual environments may not work correctly, and you have less control over the installation location and configuration.
-
Fix: Uninstall the version of Python obtained from the Microsoft Store. Navigate to python.org, download the official installer, and install it following the recommended setup.
7. Permission Issues
Installing Python in a protected directory like C:\Program Files can lead to permission errors, as standard users do not have write access to this location.
-
Mistake: Installing Python “for all users” without having administrator privileges, or installing in a restricted folder.
-
Symptom:
pip installfails with aPermissionErrorbecause it cannot write new packages to thesite-packagesdirectory. -
Fix: You have two solutions:
-
Option 1: Reinstall for a Single User: The recommended approach is to install Python for the current user only. This places the installation in the user’s
AppDatafolder, which does not require administrator rights to modify. -
Option 2: Install Packages in User Space: If you must use a system-wide installation, you can install packages to a user-specific directory by adding the
--userflag:pip install --user package_name
-
8. Not Verifying the Installation
After running the installer, it’s a good practice to confirm that Python and its tools are correctly configured and accessible from the command line.
-
Mistake: Assuming the installation was successful without any verification.
-
Symptom: You only discover a problem later when trying to run a script or install a package.
-
Fix: After the installation completes, open a new terminal window and run these commands to verify that the core components are working:
# Check the Python version
python --version

# Check the pip version
pip --version

# List all installed Python versions managed by the py launcher
py --list
9. Using Spaces in the Installation Path
Although many modern tools can handle file paths with spaces, some older scripts and build tools may fail if Python is installed in a directory containing spaces, such as C:\Program Files.
-
Mistake: Choosing a custom installation path with spaces in its name.
-
Symptom: Certain scripts or package installations fail with cryptic path-related errors.
-
Fix: It is best to stick with the default installation path provided by the installer (
C:\Users\<YourUsername>\AppData\Local\Programs\Python). If you need a custom path, choose one without spaces, likeC:\Python312.
10. Not Using Virtual Environments
A common mistake for beginners is to install all packages into the main (global) Python installation. This can lead to conflicts when different projects require different versions of the same library.
-
Mistake: All packages are installed globally using
pip install. -
Symptom: Project A requires
package-x==1.0, but Project B needspackage-x==2.0. Installing one version breaks the other project. This is often called “dependency hell.” -
Fix: Always use virtual environments to isolate project dependencies. A virtual environment is a self-contained directory that contains a specific version of Python and its own set of installed packages.
To create and activate a virtual environment:
# 1. Create a virtual environment named 'venv' in your project folder
python -m venv venv

# 2. Activate the environment (on Windows)
.\venv\Scripts\activate
Once activated, your terminal prompt will change, and any packages you install will be confined to that environment.
FAQs
1. How do I install Python on Windows 10?
To install Python on Windows 10, first navigate to the official Python website at python.org and go to the “Downloads” section for Windows. Download the latest stable release recommended for Windows. Once the download is complete, run the installer executable. On the first screen of the setup wizard, it is important to check the box at the bottom that says Add Python to PATH. After that, you can proceed with the default installation by clicking Install Now. The installer will place Python and its package manager, pip, on your system and configure the necessary environment variables.
2. How do I add Python to PATH in Windows 10?
Adding Python to the system’s PATH allows you to run python and pip from any directory in the Command Prompt or PowerShell. The easiest way to do this is to run the Python installer again, select “Modify,” and ensure the “Add Python to environment variables” option is checked on the “Advanced Options” screen.
Alternatively, you can add it manually:
- Find your Python installation folder (e.g.,
C:\Users\<YourUsername>\AppData\Local\Programs\Python\Python312\) and theScriptssubfolder within it. - Search for “Edit the system environment variables” in the Start Menu and open it.
- Click the Environment Variables button.
- Under “User variables,” select the
Pathvariable and click Edit. - Click New and paste the path to your Python installation folder.
- Click New again and paste the path to the
Scriptsfolder. - Click OK on all windows to save the changes. Restart any open terminals for the changes to apply.
3. How do I check if Python is installed on Windows?
You can check if Python is installed and accessible by opening Command Prompt or PowerShell and running the following command:
python --version
If Python is installed correctly and added to the PATH, this command will return the installed version number, such as Python 3.12.5. If you get an error that the command is not recognized, Python is either not installed or not in your system’s PATH. You can also use the Python Launcher to list all installed versions:
py --list
4. How do I install pip on Windows 10?
Modern versions of Python (3.4 and newer) automatically include pip with the installation. You can verify if pip is available by opening a terminal and running pip --version.
If for some reason pip is not available on your system, you can install it using the ensurepip module that comes with Python. Run the following command in Command Prompt or PowerShell:
python -m ensurepip --upgrade
This command will install pip if it is missing. It is also good practice to keep pip updated by running:
python -m pip install --upgrade pip
5. Can I install multiple versions of Python on Windows?
Yes, you can install multiple versions of Python on a single Windows system. The official installers are designed to coexist without interfering with each other. For example, you can have Python 3.8, 3.10, and 3.12 installed at the same time.
To manage and switch between these versions, Windows uses the Python Launcher (py.exe). You can execute a script with a specific version by using a flag. For instance, to run a script with Python 3.10, you would use:
py -3.10 your_script.py
To use the latest installed version, you can simply run py your_script.py.
Conclusion
In this article, we walked you through several methods for installing Python on a Windows 10 system. You have learned how to install Python using the official installer, the Microsoft Store, package managers like Chocolatey, and the Windows Subsystem for Linux (WSL). You also now know how to confirm the installation is working and how to establish a virtual environment to keep your project dependencies separate and organized.
With a successful Python installation on your computer, you are now prepared to begin your work with the language. As you become more familiar with the basics, you can explore other Python tutorials to learn about web development, data analysis, and automation. In the meanwhile, check out the following Python articles:
Thanks for learning with the DigitalOcean Community. Check out our offerings for compute, storage, networking, and managed databases.
About the author(s)
With over 6 years of experience in tech publishing, Mani has edited and published more than 75 books covering a wide range of data science topics. Known for his strong attention to detail and technical knowledge, Mani specializes in creating clear, concise, and easy-to-understand content tailored for developers.
Still looking for an answer?
Thanks for this page! Looked through 4 other pages and they did not help at all, this easy step by step instruction and clear explanations made it very easy to download python!
- Shristi
thank you for the explanation but when I follow all the above steps I got this message. What can I do with this challenges? Warning: This Python interpreter is in a conda environment, but the environment has not been activated. Libraries may fail to load. To activate this environment please see https://conda.io/activation
- Husaindad
This page has been helped me so much!!!.. step wise easy explanation and meaningful explanation.
- shital
Thanks for your support for installing Pathon. Amazing learning experience.
- Santosh Kumar Jha
Thank you very much for the instructions. It still works for the latest stable model (3.7.7).
- Random person
I need python. So i can use it to download google assistant. And no i don’t have a phone. Not anymore.
- David Little
 This work is licensed under a Creative Commons Attribution-NonCommercial- ShareAlike 4.0 International License.
Become a contributor for community
Get paid to write technical tutorials and select a tech-focused charity to receive a matching donation.

DigitalOcean Documentation
Full documentation for every DigitalOcean product.

Resources for startups and AI-native businesses
The Wave has everything you need to know about building a business, from raising funding to marketing your product.
The developer cloud
Scale up as you grow — whether you're running one virtual machine or ten thousand.

Start building today
From GPU-powered inference and Kubernetes to managed databases and storage, get everything you need to build, scale, and deploy intelligent applications.
